Showing posts with label Crafts. Show all posts

Friday, January 6, 2012

DIY Salvaged Wood Quote Plaque

 I found this beauty on Pinterest a couple months ago and fell in love.  So when Husband and I talked about handmade for Christmas,
I knew he would be receiving this sweet declaration.
I toyed around with some other sayings, like Katy Perry's "You're an Indian summer in the middle of winter"-- because he is, and the simple phrase, "I love our life," but this quote was too perfect, I didn't want anything else.
And of course, me and salvaged wood go together.
So I got to work.


To make my version, here's what you'll need:
  1. One wood pallet or other pieces of wood in the same size.  I knew I wanted a rustic, weathered look to my wood, so a pallet was perfect for my desired look.  Pallets can be found at many different stores for free. Husband's made friends with the folks down at the feed store and picks the pallets up for extra-easy firewood for his shop.  Length is up to you and dependant on the quote or words you choose.
  2. A sawzall if you are planning to use a pallet. A sawzall can saw-it-all.  It's what I've learned from being married to a contractor.  You'll need it to cut the wood from the nails.  Ask your handy friend with the tools to hook you up.  It was the quickest way to get the wood that I wanted.  Otherwise you can use other pieces of wood, salvaged or not.
  3. A font.  I chose this free font.
  4. Cardstock
  5. Xacto knife/cutting pad
  6. Paint/paint brush
  7. Metal brackets for assembling individual pieces of wood together.  I bought my brackets over six months ago, and I bought two packages and I think I paid around $3.50 for each.
Now for the craft:

Print out your font onto cardstock.  Make sure your letters are the appropriate size to fit your boards the way that you want. 
Cutting the letters was by far the most time consuming part of this project,
but it's worth it!
I found it easiest to print as many of the letters in their words on one page so I could cut as much of the whole word and place it on the wood as one piece.
Once I had the cutting complete, I looked over my wood and decided how I wanted my quote to be arranged. 
Do you want it to be blocked, centered, in less rows, more rows, etc.
Then you tape in place.
Make sure it's pretty secure.  You don't want your paint to seep up underneath the cardstock and make a mess.

Then get painting!  I used a small sponge brush and it worked great.
After a couple letters, I found that as much as I wanted the letters to have their outline,
I didn't want them to be perfect, so I made a pretty quick go of it.


Then I had myself the makings of a salvaged wood quote plaque.
Our same handy friend, took care of screwing on the brackets for me.
And this is what I got:
These kids are hysterical, I tell you.
One minute in and mainly spent trying to get each of them to hold the board with two hands, Asher said to heck with it and went to find his tractor.
But this one is perfectly fine with a solo photo shoot, even if the subject of the shoot is half on the ground.
But then Asher came back feeling refueled and happy to liiiiiift that board up with his superhero powers, costume or not.
It was certainly a struggle.
So to the ground the plaque went, and I encouraged some sweet sibling love, because they're still young enough to do these things on command.  I don't imagine they'll still be up for these things in five or ten years, so I must give these directions, now.


Inspiration again:


End result:


One handmade gift that Husband loved,
a lovely new piece of wall art,
a prop for some cute photos of my kids,
and it was easy and free!


Monday, October 17, 2011

An Eccentric Burlap Chair Makeover

How was your weekend, friends?  Ours was good!  Husband was away, so there was a sleepover with a friend and her little one, a couple late nights and naps to make up for them, and spontaneous crafting revolving around my kitchen table chairs...

Back story: Fabric dining chairs are not for kids--or dogs.  So it wasn't long before I was embarrassed to even have guests sit at the table since on any day, there could be a stain, two or three waiting for them as they pulled out their chair.  Eww, right?  And the upholstery cleaner attachment--I'm still looking for that.  Regardless, the tan fabric covering the chairs had to go.
Much to my surprise and and excitement the seats screwed right off.
The set had been covered a couple times already, and since I didn't have the tools, and let's be honest--the time, I decided to cover the cushions right on top of the other fabric.

Insert fabric:
Collected burlap sacks. 
 Husband found one sack in the attic and the other two came from firewood
bundles on a camping trip.  I knew I could make use of them!
What's that I hear you say?  Yes, it is still "tan," but it's way more awesome!
Stapling six chairs will give you some serious wrist cramps, but the payoff is fantastic!
I've just decided to lay towels over the chairs when my sloppy kids sit in them.
A practical solution for what are impractical chairs for this little family.
Who wants to place bets on how long it takes for one to be completely ruined? 
I'm trying not to think about that.
Join me for dinner?

Time: 2 hours
Re-upholstery Cost: $0.00! 

Slowly but surely this place is coming together.
Good grief.
Now...if only this set was black...

xx, Cassie

Monday, June 20, 2011

A DIY Vintage Button Lamp Shade

Hello!  Did you have a great Father's Day weekend?  Friday, we headed to Long Beach, Washington, to visit Husband's parents, and we stayed up talking and laughing late into the evening.  Saturday, we lounged around watching documentaries. We loved Surfwise.  Have you seen it? And yesterday, the kids and I treated Husband to coffee, Dutch Babies (family recipe here), and a garden stake sign and heart banner taped across the doorway made by the kiddos to express their ginormous love for Dad. 
It was a good, full weekend.

While Husband was taking in a Father's Day nap, I worked on a project that I've had in mind for weeks.  Remember those vintage buttons that I found?  Or the fab idea that I said I had for them? 
Finally, a project has been brought to fruition.

A DIY Vintage Button Lamp Shade
Scour flea markets and garage sales for some vintage buttons,
pick up some great lamp bases and shades--I got mine at Home Goods,
and grab your glue gun!


 After much consideration and no opinion lended from Husband, I settled on the green/gold/silver buttons--most of which are patina covered, with their edges worn and rusty. 
I was afraid to bring in too much color, especially since our bedding has a lot of color.
I used hot glue to adhere the buttons, and to make for a smoother side to apply the glue,
I used my metal cutters to remove any backs of the buttons that wouldn't allow them
to lay flat against the lamp shade.
Then I went to town, rotating various shades and sizes of green, gold and silver.
I am happy that I started with only one line around the base,
because that is all my collection would allow!
I was near the end of my supply.
What do you think?  I think they are a perfect accessory for my Anthro bedding.

Did you do any fun projects this weekend?

xx, Cassie

Monday, April 18, 2011

A Garbage Gold Mine

It was a good long weekend, you?  There was a fort, a birthday party for the kids, a visit from Grandpa, and practically an entire day spent painting and refinishing furniture.  I even had Husband on board, and heard him say he was having fun!  Sometimes it is like pulling teeth to get him to help me with projects, and you'll know why by the end of this post.  Once the last of the painting is completed and the space gets put together (right now there are boxes and ladders and paint cans on the floor), I'll get the pictures up. 
I'm so excited! 


Remember when I said that Husband brought home some salvaged treasures?
Well, he didn't exactly dumpster dive, but he did happily pluck these
from the hands from someone who was off to take them to the can.
Maybe I need to explain further? Have I told you that Husband is a contractor, and he builds, remodels and restores homes?  That's why he was near the garbage,
and thanks to him, sometimes I have the privilege of ending up with treasures like these.
He's a gem, right?


Husband says he stressed that he'd get some serious married-with-benefits sort of compensation for this save.  He's a funny one, eh?  Shouldn't our men just be looking out for us, regardless?

I think I have plans for the gold one after Husband sprays some sort of sealant over the lead paint.  He tried to convince me they needed to be sanded down and repainted, but I can't imagine parting with the original, weathered wear.  On the other hand, I've seen some nice refinished window frames.  What's your stance?


What would you use them for?

There is SO much possibility!

Friday, March 25, 2011

Some Rainy Day Color

Its been work, work, work, and rain, rain, rain around here.

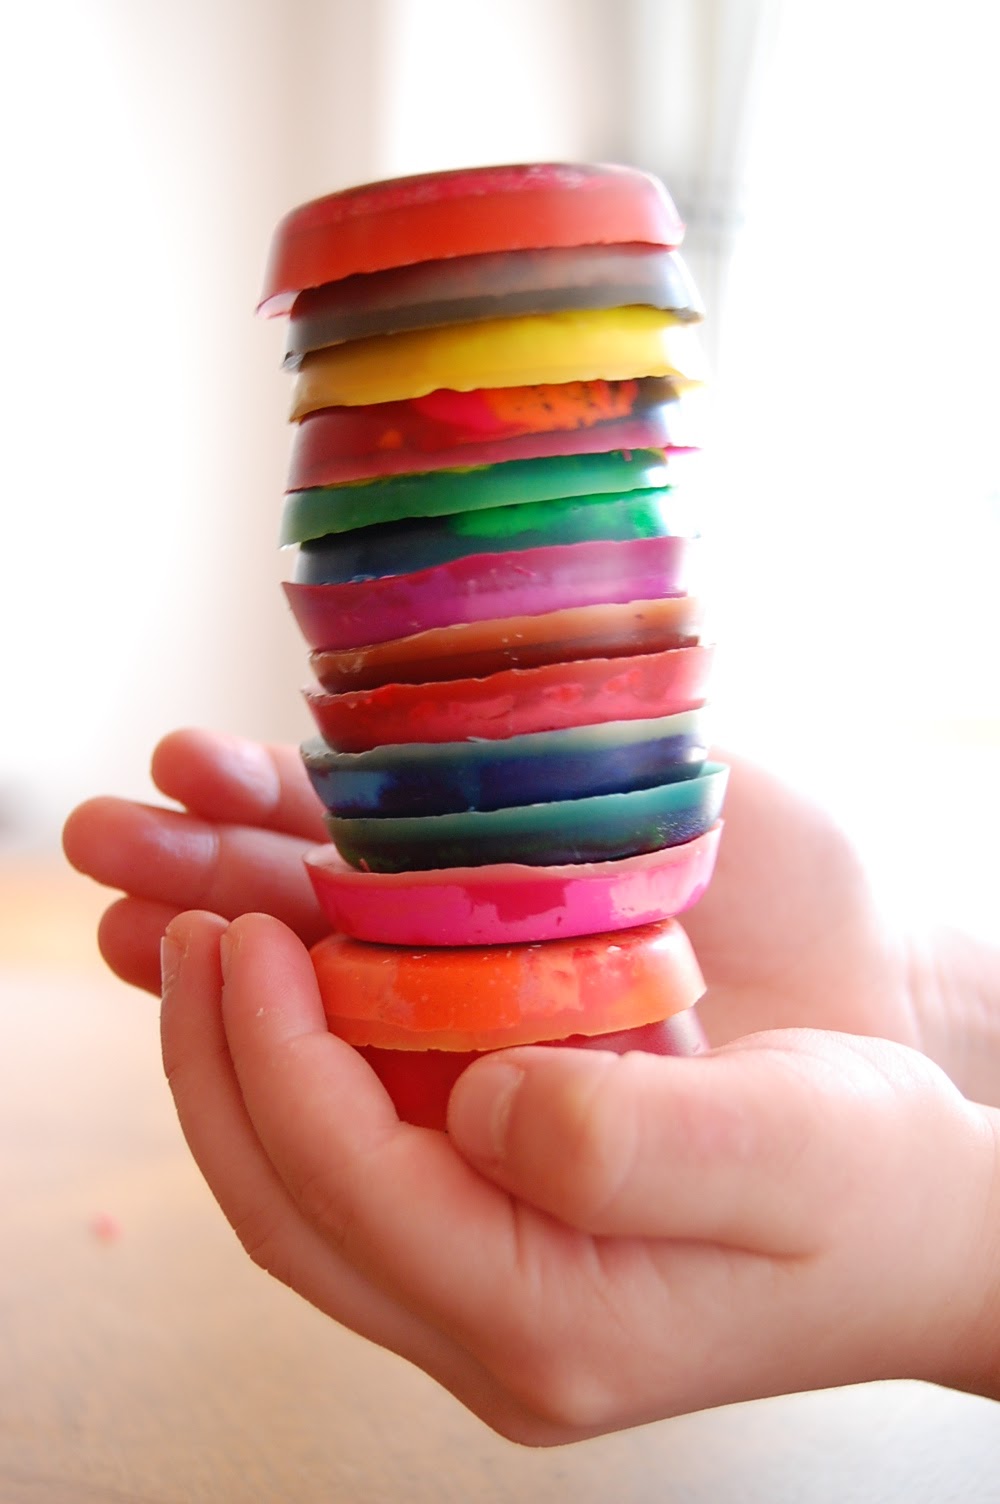
When I saw this mini-tutorial for DIY Recycled Crayons over at Living the Swell Life--a wonderful little blog, I knew we had to do it to bring some color into our dreary day.

I think the best part of this craft are the pictures! 
Love all the color!


Aren't they fun?  We're going to package up a handful
to put in birthday gifts for a couple of Brooklynn's friends.

Now, what other things can we do to forget about the rain?

P.S. I'm linking up to Friday Pretties. 
Go on over and visit Joyce and all the pretty things!

“You must write every single day of your life... You must lurk in libraries and climb the stacks like ladders to sniff books like perfumes and wear books like hats upon your crazy heads... may you be in love every day for the next 20,000 days. And out of that love, remake a world.” ― Ray Bradbury
Related Posts Plugin for WordPress, Blogger...

  © Blogger templates Brooklyn by Ourblogtemplates.com 2008

Back to TOP